
Being asked (Cristescu Adina, this one is for you ;)), today i want to talk about how i „develop“ the raw files that comes out of my scanner. Let’s make it clear what it means a RAW file: it actually means that no setting set in scanning software (Vuescan) has any impact on that raw file except scanner exposure. The rest (white balance, black and white point, curves, brightness) are just there for scan preview only.
That raw file has to be mapped to the jpeg i post online and this process of mapping i call it „developing the raw“, because it has lots of similarities with the analog procedure photographers used to use when making a print.
Here’s one photograph as it comes out of the scanner and the same picture „developed“. Using the Auto setting in the raw converter doesn’t give me a optimum file but one with no information lost (no white/black clippings). Unfortunately, it’s also a very flat photograph, with nothing special about it.


I cannot say how Acsinte wanted the picture to be because we are missing one term of the equation — the printing stage — and, without the actual print, I can only guess. That’s why the next step (that i call „histogram normalization“) is entirely suited to my taste only and it consists in applying levels in Photoshop. For the photograph i choose as example, those levels looks like this:
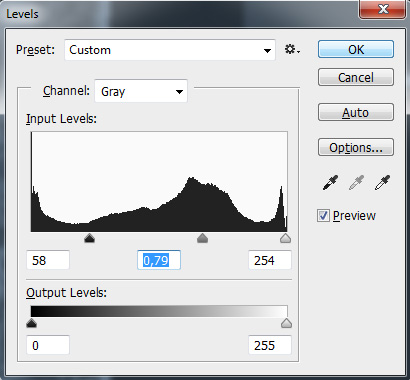
Levels added in Photoshop
Wrapping it up, this is how the picture looks like as it comes out of the scanner and how it looks like finalized (posted online):

